Following the SL-TeDOL Arts Integration in Foreign Language Instruction Online Course, we came together to plan the AIFLI Online Conference. Our aim was to reconnect course participants and bring together a broader community of language teachers to introduce the arts integration approach and share our experiences in putting it into practice.
The “Play Make Learn Conference” was held on August 8-9, 2022 at the University of Wisconsin-Madison in the United States. This interdisciplinary conference brought educators, researchers, designers, educational game developers, museum and library educators together to share innovative ideas and practices on the topics of game design and game play, personalized learning, arts integration in formal and informal spaces, making and makerspaces, playful learning, and research partnerships.
My main motivation for this conference was to gain new perspectives particularly about arts integration and museum learning that would enable me to design lessons bridging arts and language instruction. In line with this, I would like to share my experience of one of the workshops at this conference that gave me an idea about how I can implement performing arts into my teaching context to provide my students with the opportunity for creative expression in the target language.
Erica Halverson, Kai Saplan, Andy Stoiber and Jonathan Tunstall introduced us to their arts education residency program “Whoopensocker” and provided us with the actual experience of a highly effective community building practice designed to enhance creative expression and collaborative writing. We, as the residents of the imaginative Whoopensocker City, started the workshop by brainstorming the characters living together in this community and their existing problems.
The second phase of this practice consisted of a collaborative writing practice which involved us working in groups to write a story based on the details we came up with in the brainstorming phase. Then, we performed our stories in groups and shared our reflections about this creative performing arts-based experience. I believe the steps of this art-based practice can likewise be applied within our teaching contexts in the School of Languages.
As well as participating in conference sessions, I had the opportunity to deliver a poster presentation titled “Building Classroom Community through Art: Collective Poetry” through which I introduced the steps of collective poetry and shared how my students in an intermediate English class responded to it.
In sum, the Play Make Learn Conference promoted an interdisciplinary learning opportunity for professionals from a variety of fields to explore cutting- edge ideas and experiences at the intersection of education, technology and art.
The Creativity Toolbox: Practices for Creative Empowerment in the Classroom
Sarah Lee, Sophia University, Japan
Sara Lee delivered an inspiring presentation in TESOL Convention, which took place online on March 23-26, 2022. Reflecting on her own approach to creative teaching, Lee informed us educators about the ways we can implement creativity into our daily lives and classrooms. She started her presentation by referring to the individualistic and sociocultural definitions of creativity (Sawyer, 2012), and explained that creativity should be empowered in the classroom as it is one of the most important 21st century skills. She emphasized the need for a framework, which structures a creative process, to enhance our creative potential. She illustrated the steps of this creative process through Csikszentmihalyi (2013)’s book of “Creativity: Flow and the psychology of discovery and invention”.
Lee explained that this process is not linear but recursive, which requires us to go back to the beginning stage and go through the earlier stages to finalize the creative process. She moved on and suggested that educators should incorporate some practices in their teaching to encourage students to develop their creativity. First of all, she highlighted the importance of openness, flexibility and sensible risk taking, which are conducive to creative teaching. In line with these, she suggested educators take sensible risks within the framework of lesson plans and curriculum when they encounter moments for creative teaching even if it is something that is not planned to do. Secondly, she explained how Sawyer’s idea of disciplined improvisation could be helpful to promote creativity in our teaching. She stated that it is also important for educators to try to understand the characteristics of creative students in order to address their needs. According to her, the problematic behavior that we identify may sometimes signal creativity in students. One last point that she touched upon was about the students who are less likely to demonstrate their creativity in the classroom. She reminded that students are more likely to express their creativity in productive ways when mistakes are encouraged as a natural part of the learning process. She finalized her presentation by sharing the suggestions below that will help educators develop their own creative potentials, which can naturally be translated into our teaching practice.
Identify your creative strengths
Engage in everyday creativity (little c)
Mindfulness
Keep a Journal (sketchbooks, notebooks etc.)
Incubate (Give yourselves time)
Play (Engage in something less serious and less academic, observe children because they are inherently creative)
In this post, I will share how I turned a unit on history, which most of my students -unfortunately- lack interest in, into a lesson that engages students actively in the learning process.
We use “Contemporary Topics 1” in B1 classes to improve the listening skills of the students through the listening practices it provides.
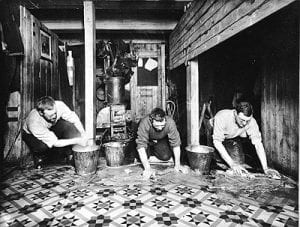
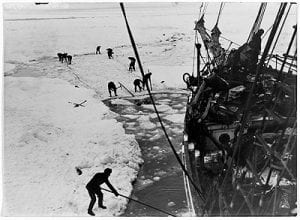
To engage students in the content of the lesson and give them a purpose to learn as much as they can about the topic, I designed an online collaborative writing homework by using the photos taken by Frank Hurley, who accompanied Shackleton on the Trans-Antarctic Expedition to record events.
In the warm-up, students explored the relevant vocabulary in the table below and made predictions about the topic of the lesson. The vocabulary below guided them to guess some of the details they were likely to learn in the lesson.
Students were shown some photos from the expedition and asked to describe them by using the words in the table.
Scrubbing out “The Ritz” Seen here from left to right: James M. Wordie (Geologist), Alfred Cheetham (Third Officer), and Dr. Alexander H. Macklin, SurgeonTrapped in the Weddell Sea, desperate efforts were made to free the ship, these were of no avail, because the ice froze together as quickly as it could be cut away 14th February 1915
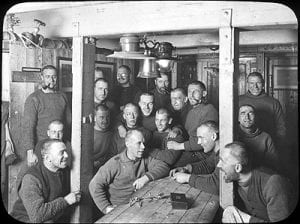
Then, students shared their opinions about the crew on the expedition, and their occupations. Following that, they were asked to answer the question “What qualities would those people need for a successful trip?” guided through the photo below.
The crew of the Endurance following some severe haircuts
After that, students were ready enough to listen to the lecture video and do the listening practices in the book.
Completing the listening task in the lesson, students were assigned to complete the collaborative diary of the crew of the Endurance on the Trans-Antarctic Expedition on the google site. You can find the guidelines on the link.
In this follow up activity, their notes on the diary demonstrate that they could show some level of empathy with the crew locked in by ice.
Printing Press is an easy tool that we can use in our classes to have our students create classroom newspapers, flyers and brochures. What they need to do is to decide on the context, choose from the templates the tool provides and publish it. I personally think that adding some visuals would make it more attractive, but it still provides an interactive platform for writing practice.
In one my previous posts, I mentioned how I integrate literary arts in the form of erasure poem in my both English and Turkish classrooms. Now that we have an idea of found poetry, erasure and blackout poems, I will introduce you to a new online tool “Blackout Poetry Maker“.
3 sample texts are available on the website to work on. We can also paste the text of our own choice on the box given. After that, we select the words that we want to keep. Then, click “black out.” We can save our poem as an image with a click on “Render Square”.
Text Source: Pride and Prejudice
We can ask our students to create their black out poems to practice the target language by considering some grammar objectives. We can ask them to have some specific structures learned in class such as Relative Clauses, Noun Clauses and Passive Voice. This activity also gives them the chance to practice vocabulary (word formation, collacations, adjectives and adverbs etc.) in a creative way.
Let me remind you the steps we follow while creating our blackout poems:
“In the end, creativity isn’t just the things we chose to put in, it is the things we chose to leave out.” -Kleon
Here are the steps to follow when practicing ekphrastic poetry:
Choose a work of art, usually a painting, that inspires you.
Analyze the painting and take notes on the colors, shapes, and overall mood.
Free-write about your initial impressions and reactions to the painting.
Identify key words or phrases that capture the essence of the painting.
Use these key words to craft a response poem that captures the emotions and themes of the artwork.
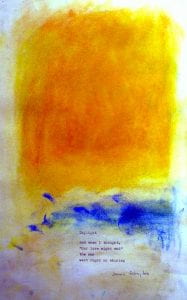
Following similar steps, I will now share how I use paintings to stimulate writing in my Turkish classroom.
They were students learning Turkish as a foreign language in B1 level.
Step 1: LOOKING AT THE PAINTING
I led students through the painting on the screen.
Photo Source: WikiArt.org
Step 2: FREE WRITING
I guided them through the questions (in Turkish) below:
What shapes do you see? Do they remind you of anything?
What colors do you see? How do these colors make you feel?
If you were living in the picture, what would you see around? What would you smell? What would you hear?
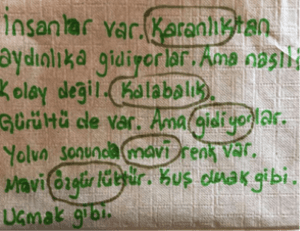
Then, I asked them to circle 5 words.
Example:
STEP 3: COMPOSE A POEM
Students were ask to write a poem as a response to the painting by using the words circled.
Example:
STEP 4: SHARE YOUR POEM
They shared their poems with the class.
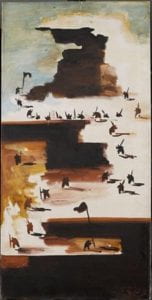
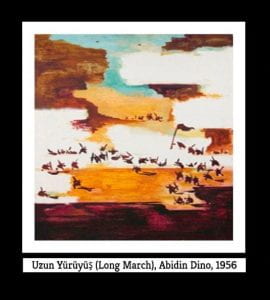
Upon completion of the activity, I introduced “Abidin Dino“, who is a well-known Turkish painter. Then, I shared some information about his painting “Long March” along with the ekphrastic poem written by one of the greatest Turkish poets, Nazım Hikmet.
“Bu adamlar Dino,
Ellerinde ışık parçaları,
Bu karanlıkta, Dino,
Bu adamlar nereye gider?
Sen de, ben de Dino
Biz de, biz de Dino
Gördük açık maviyi.?
Nazım Hikmet, 1958
Overall, students found the lesson very engaging and gained confidence in their language skills when they saw they could even write a poem in Turkish. It was also very interesting to see how close one student’s poem was with the actual ekphrastic poem. Additionally, the lesson was effective in terms of sharing culture of the target language.
The word ekphrasis originates from Greek language and is mainly used in its adjective form “ekphrastic“.
Ekphrastic poetry can be defined as poems inspired by another work of art, generally paintings. It can also be considered a literary response to a non-literary work.
Example: Painter Joan Mitchell & Poet James Schuyler
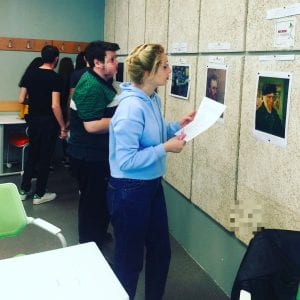
Integrating the ekphrastic poetry, I designed an artful lesson to enhance creativity and expand intellectual knowledge of my students in my B1 level class. The content of the lesson was mainly focused on the world famous artist Van Gogh. (Because I realized that most of my students can’t recognize some of the most popular art works of Van Gogh, who is one of the greatest painters of all times.)
I created a mini art exhibition by hanging most famous paintings (color print) by Van Gogh on the walls of the classroom with song “Vincent” by Don McLean in the background. The reason why I used this song was that Don McLean composed it about Van Gogh after reading his biography, and the lyrics reveals some details not only about him but also his paintings.
LESSON 1
Step1: Introduce the paintings
When students entered the classroom, I gave each student the name of one painting on a piece of paper. Then, I asked them to post it on the right painting (match the title with the painting.) while looking at the paintings on the wall.
Wheatfield With Crows, 1890
The Potato Eaters, 1885
Bedroom In Arles, 1888
Self-Portrait With Bandaged Ear, 1889
Cafe Terrace At Night, 1888
Sunflowers, 1888
The Starry Night, 1889
Red Vineyards at Arles, 1888
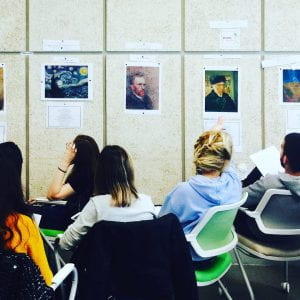
Step 2: Who is Van Gogh?
I prepared a set of information about Van Gogh and the paintings on the wall. I asked students to get one information paper from the desk and stick them below the relevant paintings. There was also a separate column for the specific information about Van Gogh.
There was another Vincent van Gogh before him – his brother who died during labor was given the same name.
Van Gogh only started painting at the relatively late age of 27 and was mostly self-taught.
During his lifetime, van Gogh created about 2,100 pieces of art, 860 of which were oil paintings. Most of them were done in the last 2 years of his life.
Because he couldn’t afford to pay models, van Gogh would initially paint flowers, landscapes, and himself. He painted over 30 self-portraits.
While he was alive, van Gogh only sold one painting, The Red Vineyard. He didn’t become famous until after he died.
There are many theories surrounding the van Gogh ear cutting incident.
Then, we sat in a circle to share what we learned about Van Gogh and his paintings. I guided them through some questions such as
When was Vincent born?
Which of his paintings did he made in the mental hospital?
How many paintings did he made in total? Did he sell them?
Students were given a paper with the lyrics of the song “Vincent” on it. They were asked to analyze it in connection with the paintings and information on the wall.
They could make some connections as below:
Flaming flowers: Sunflowers, 1888
Swirling clouds in violet haze: The Starry Night, 1889
Field of Amber Grain: Wheatfield With Crows, 1890
Weathered Faces: The Patato Eaters, 1885
You took your life, as lovers often do: His suicide
When no hope was left in sight: His suicide
This world was never meant for one as beautiful as you: His suicide
With eyes that know the darkness in my soul: He suffered from mental illness
How you suffered for your sanity: He suffered from mental illness
Now I think I know what you tried to say to me: He became famous after his death.
LESSON 2: Ekphrasis! Poems inspired by paintings
Step 4: Free Writing
*This stage were designed to prepare students for the poem they would write in the next stage.
Students were asked to choose one painting to work on.
Then, they were given a handout with the instructions.
While they were looking at the paintings, I facilitated the free writing process for my students through the questions below that encourage deep focus:
What do you see in the paintings? List them.
What color is the brightest/ faintest? What feelings can you associate these colors with?
If you were in the painting, what/who would you see around? What would you smell? What would you hear? How would the weather be like? How would you feel?
What about the season, month?
What else do you see? How do you describe them?
How would Vincent Van Gogh feel while painting it? Was he alone?
Completing free writing, they were asked to circle 5 words on it.
Examples:
“It is a sunny day. Stars are shining. It will rain soon. So the air smells fresh like woods. The village is crowd but it has silence around. I think wind isn’t real. It is just like his imagination. Mountain is dark and deserted.”
“Looking at the stars makes me dreamy. Also, there is darkness that feel me a bit depressed. The most of the painting the painter use dark color. It shows the pessimism in the inner world of painter. There is a little bit light colors; yellow and white. It describes light in the dark showing hope inside of the painter. I think he contradict himself…”
Step 5: Ekphrasis
Students were explicitly introduced to the Ekphrastic Poetry and reminded about the connection between the Vincent song and the paintings.
They were asked to write a poem in response to the painting they chose by using the words they circled on their writing along with the instructions below:
Your poem can be about
the scene or the subject depicted in the painting
your experience of looking at the painting
how/why Van Gogh created this artwork
You can write your ekphrastic poem
by using your own voice
in the voice of Van Gogh
in the voice of the figures in the painting
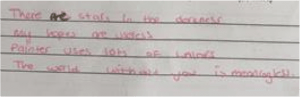
In the end, they shared their ekphrastic poems with the class.
“These are stars in the darkness
My hopes are useless
Painter uses lots of colors
The world without you is meaningless.”
“In the dark shadow of the windy nights
Tears clouded my eyes.
I had a vivid dream of you
that you died.
I looked at you in silence
and remembered;
We always lived in the stars of the starry night.”
*After the lesson, students were suggested to watch the fully-painted animated biographical drama movie “Loving Vincent” about the life of Van Gogh.
♥ I would like to extend my sincere gratitude to Brown University Sheridan Center for the workshop ” Ways of Looking III: Teaching Writing through Art” held in the RISD Museum for the inspiration.
 We use “Contemporary Topics 1” in B1 classes to improve the listening skills of the students through the listening practices it provides.
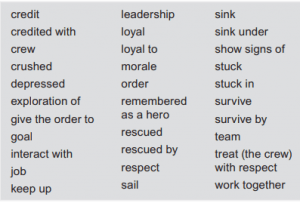


 3 sample texts are available on the website to work on. We can also paste the text of our own choice on the box given. After that, we select the words that we want to keep. Then, click “black out.” We can save our poem as an image with a click on “Render Square”.


 I prepared
 *This stage were designed to prepare students for the poem they would write in the next stage.

 Students were explicitly introduced to the Ekphrastic Poetry and reminded about the connection between the Vincent song and the paintings.